Putting a patio heater in the wrong spot is one of those mistakes that seems small — until you’re sitting there still cold, the heat is blowing away, or the unit ends up way too close to furniture, curtains, or the roof above it.
That’s why patio heater placement matters more than most people think. It’s not just about finding an empty corner and calling it good. The right spot affects how warm your space feels, how many people actually benefit from the heat, and whether the setup is safe in the first place.
This guide breaks it down in simple terms. We’ll cover where to place a patio heater for real comfort, how much clearance you usually need, what changes under a covered patio, and the layout mistakes that make heaters work worse than they should. The goal is simple — help you place your heater where it actually works, without turning the setup into a safety problem.
What’s covered
- The first things to check before you place a heater
- Quick clearance rules for gas vs. electric
- Best placement for seating, dining, and larger patios
- Covered patio and wind considerations
- Common placement mistakes to avoid
- A simple layout plan you can use before you commit
Patio heater placement cheat sheet
If you only read one section, make it this one.
| Situation | Best placement move | Why it works |
|---|---|---|
| Small covered patio | Use a wall- or ceiling-mounted electric heater aimed at seating | Saves floor space and usually fits tighter clearances better |
| Open lounge area | Place a freestanding heater just outside the seating cluster | Warms people without blocking movement |
| Large sectional setup | Use two heaters diagonally instead of one in the middle | Reduces hot spots and cold corners |
| Outdoor dining table | Place heater at the side or end of the table | Spreads warmth more evenly across guests |
| Windy patio | Place heater near a wall, screen, or windbreak | Helps keep warmth from getting stripped away |
| Tight patio with lots of traffic | Keep heater out of walkways, even if it looks centered | Better safety and fewer bumps or trips |
Quick rule of thumb: Don’t try to heat the whole patio. Heat the zone people actually use.
Start with the heater type — because placement isn’t the same for all of them
Before you decide where the heater goes, you need to know what kind of heater you’re working with. That changes almost everything.
Freestanding propane heaters are the classic tall mushroom-style models and pyramid flame heaters. These give you flexibility because you can move them around, but they also need the most breathing room. They’re usually better for open patios, dining clusters, and lounge areas where floor space isn’t tight.
Wall-mounted and ceiling-mounted electric heaters are more directional. Instead of trying to warm the whole open air around them, they throw heat toward a target zone. That makes them a strong fit for covered patios, outdoor dining tables, and smaller spaces where you don’t want a big heater base in the way.
Tabletop heaters are the most limited in reach, but they work well for close-up warmth at small bistro tables or intimate seating setups.
The big takeaway is simple: don’t place every heater like it works the same way. A freestanding propane unit usually warms a zone around it. A mounted electric heater works best when aimed at the people you want to warm.
Best heater type by patio layout
| Patio setup | Best heater type | Why | Watch out for |
|---|---|---|---|
| Covered patio with seating | Mounted electric infrared | Directed heat, cleaner look, less floor clutter | Mounting too high or aiming it poorly |
| Open-air dining space | Freestanding propane | Flexible placement and wider warmth zone | Wind exposure and overhead decor |
| Small balcony or bistro area | Tabletop or compact electric | Better fit for limited space | Overestimating coverage |
| Large patio with separate zones | Multiple smaller heaters | More even comfort than one oversized unit | Trying to heat the whole patio with one heater |
| Semi-enclosed covered patio | Usually electric over gas | Easier fit, fewer venting headaches | Using gas where airflow is limited |
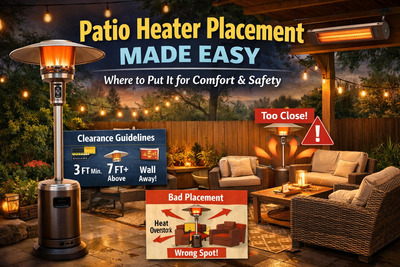
Quick clearance rules — the heater manual wins, but these numbers help
This is the part you don’t want to guess on. Exact clearance requirements vary by model, so the manufacturer’s manual always comes first. But as a planning baseline, these general rules are useful.
| Heater type | Typical ceiling clearance | Typical side clearance | Typical floor height / clearance |
|---|---|---|---|
| Electric mounted heater | 6 to 10 inches above, sometimes more by model | Around 10 to 18 inches to sides/walls | Usually at least 6 feet from floor |
| Gas mounted heater | Often around 3 feet above | Often around 3 feet to walls/combustibles | Usually at least 6 feet from floor |
| Freestanding propane heater | Usually at least 3 feet from overhead combustibles | Usually at least 3 feet around unit | Place on hard, level surface |
Those numbers are only a starting point. Some gas units need more space. Some electric infrared models allow tighter clearances. Some gas heaters can reduce overhead clearance with a heat deflector. That’s why “about 3 feet” is useful for planning, but not a substitute for the actual manual.
A good simple rule: if there’s fabric, wood, plants, branches, umbrellas, curtains, speakers, lights, or a ceiling fan nearby, double-check the manual before you commit to that spot.
Quick visual: gas vs. electric placement fit
This isn’t lab data — it’s a practical layout guide.
| Factor | Electric mounted | Gas heater |
|---|---|---|
| Easier to use on covered patios | 5/5 | 2/5 |
| Needs larger clearances | 2/5 | 5/5 |
| Better for open layouts | 3/5 | 5/5 |
| Easier to fit into small spaces | 5/5 | 2/5 |
| Easy to reposition later | 2/5 | 5/5 |
The best place is usually at the edge of the gathering zone — not in the middle of it
A lot of people stick a heater wherever there’s room. That usually means the middle of a walkway, behind a chair, or jammed next to a wall. It might technically fit there, but it often heats badly.
For seating areas, the sweet spot is usually just outside the conversation zone, angled toward the people using it. With a freestanding heater, that often means placing it near the edge of the seating group rather than directly in the center. If it’s too central, somebody ends up roasting while everyone else still feels chilly.
For sectionals or larger lounge setups, one heater often isn’t enough. Two heaters placed diagonally across from each other usually work better than one oversized heat source. That creates a warmer pocket instead of one hot side and one cold side.
For dining areas, mounted heaters often make more sense than freestanding ones because they keep the floor clear. If you’re using a freestanding model near a table, position it slightly off to the side or at the end of the table so the heat reaches everyone without blasting one guest at close range.
The basic idea is simple — heat the people, not the empty air around them.
Sample layout ideas
| Patio type | Placement idea | Why it works |
|---|---|---|
| 4-chair conversation set | One freestanding heater just outside the circle at a slight angle | Shared warmth without putting the heater in the middle |
| Long dining table | Mounted electric heater above or slightly beyond table edge | Keeps the floor clear and spreads heat more evenly |
| L-shaped sectional under cover | Two mounted electric heaters aimed across the seating zone | Helps reduce cold spots along the longer seating run |
| Open patio with dining + lounge | One heater per zone instead of one central unit | Matches heat to how people actually use the space |
Simple top-down layout sketch
GOOD LAYOUT
────────────────────────────────────────
[Wall / Windbreak]   H  →→→ heat toward seating
        [Chair]   [Table]   [Chair]          clear walkway hereBAD LAYOUT
────────────────────────────────────────
[Chair]   [Table]   H   [Chair]    heater in middle of traffic path
    uneven warmth + bump/trip risk
Wind matters more than BTU claims
Outdoor heater placement is never just about the heater. It’s also about what the wind is doing.
Even a strong heater can feel disappointing if it’s sitting in a direct wind path. If your patio gets a steady breeze, place the heater where walls, fences, planters, pergola posts, or screens help protect the warm zone. You’re not trying to trap dangerous fumes — especially with gas — but you are trying to avoid putting the heater where every bit of warmth gets stripped away.
This matters even more with propane models that mostly warm the surrounding air. Electric infrared heaters usually handle breezy conditions better because they heat people and surfaces more directly, but they still perform better in protected areas.
A simple real-world example: one heater near an exterior wall beside your lounge chairs will usually feel warmer than the same heater placed out in the open center of the patio.
So before you pick a spot, watch how air moves through the space. Where do cushions get blown around? Where do people naturally avoid sitting on cooler nights? Those clues usually tell you where heater performance will be weakest.
Wind-smart placement checklist
| Check | Why it matters |
|---|---|
| Is the heater directly exposed to prevailing wind? | Heat will feel weaker fast |
| Is there a wall, screen, or planter nearby? | Can help protect the warm zone |
| Are you placing a gas heater in a tight corner? | Better wind protection is good, but airflow still matters |
| Is your seating zone sheltered but not enclosed? | Usually the sweet spot for comfort |
Covered patios need extra care — especially with gas heaters
Yes, you can use a patio heater under a covered patio in many cases. But this is where people get themselves into trouble by treating “covered” like “anything goes.”
With electric heaters, covered patios are often the easiest place to get good results. Mounted electric infrared heaters are popular there for a reason — they save floor space, direct heat where you need it, and usually allow tighter clearances than gas models.
With gas heaters, you need to think about both clearance and ventilation. Gas units generally need more overhead space and more open-air ventilation. That’s one reason gas heaters are usually a worse fit for enclosed porches or tighter covered structures.
Also remember that the roof material matters. A high non-combustible ceiling is very different from a low wood pergola with hanging string lights and fabric curtains.
Covered patio decision table
| Question | If the answer is “yes” | If the answer is “no” |
|---|---|---|
| Is the ceiling high enough for model clearances? | Keep checking the rest of the setup | Don’t install there |
| Are beams, curtains, fans, or lights far enough away? | Spot may still work | Reposition or choose another heater type |
| Is there enough airflow for a gas heater? | Possible fit | Gas is likely the wrong choice |
| Would a mounted electric heater solve the problem more cleanly? | Probably worth choosing electric | Freestanding gas may still make sense in open areas |
Before you install under cover, ask: Is this spot safe because it’s actually appropriate — or am I just making it fit because it looks convenient?
Stable surfaces and traffic flow matter more than people expect
A heater can have perfect clearances and still be placed badly.
Freestanding units need a hard, level surface. Concrete, tile, pavers, and solid decking are usually fine. Grass, soft soil, and uneven spots are not. If the unit can wobble, lean, or get bumped easily, that’s already a bad location.
You also want to keep heaters out of high-traffic paths. If people have to squeeze around it to get to a chair, a grill, or the back door, it’s in the wrong place. The best heater spot is usually slightly out of the traffic lane while still close enough to the seating zone to be useful.
This is also where hose and cord routing matter. Gas hoses shouldn’t run where people can trip on them. Electric cords shouldn’t stretch across walkways or sit where furniture legs can crush them. A heater that warms well but creates a trip hazard isn’t a smart setup.
Placement priority stack
Think about placement in this order:
- Safe clearances
- Stable base
- Good heat direction
- Minimal trip and bump risk
That order saves a lot of frustration.
Common placement mistakes that make patio heaters work worse
Most bad patio heater setups come down to a few repeat mistakes.
| Mistake | What happens | Better move |
|---|---|---|
| Putting the heater too far from where people sit | The heater is “on,” but everyone still feels cold | Build warmth zones around real seating areas |
| Placing it too close to guests | One person gets blasted while others stay chilly | Move it slightly outside the gathering zone |
| Ignoring overhead objects | Higher fire-risk and clearance problems | Check beams, umbrellas, lights, and curtains first |
| Trying to heat a huge open patio with one unit | Hot and cold spots everywhere | Use multiple smaller zones |
| Using a gas heater where ventilation is poor | Safety and performance problems | Choose a more open location or go electric |
| Treating the manual like optional reading | Easy to miss model-specific limits | Check the actual manual before final placement |
| Placing freestanding heaters on uneven ground | Wobble, tipping risk, awkward use | Use only hard, level surfaces |
A simple way to figure out placement before you commit
You don’t need software to test a patio heater layout. You just need a rough plan.
Step 1: Mark the gathering zones
Draw or picture where people actually sit — dining table, sectional, chairs, bar stools.
Step 2: Mark the no-go areas
Note curtains, umbrellas, plants, TV mounts, fans, beams, lights, walkways, and anything combustible or awkward.
Step 3: Match heater type to zone
Mounted electric for targeted covered seating or dining. Freestanding propane for flexible open-air zones. Tabletop for close small-group use.
Step 4: Test the position before final install
For portable units, move the heater into place and sit where guests would sit. Check comfort, clearance, traffic flow, and wind exposure.
Step 5: Adjust before you commit
A heater that looks centered and balanced isn’t always the one that feels warmest. Comfort beats symmetry here.
A quick test run is often the fastest way to catch a bad placement before it becomes your permanent setup.
5-minute placement test card
| Ask this before you commit | Yes | No |
|---|---|---|
| Is the heater close enough to people to matter? | ☐ | ☐ |
| Is it outside the main walking path? | ☐ | ☐ |
| Are overhead and side clearances safe? | ☐ | ☐ |
| Is the surface stable and level? | ☐ | ☐ |
| Will wind ruin the heat in this spot? | ☐ | ☐ |
| Does this layout make more sense than a different heater type? | ☐ | ☐ |
Bottom line
The best place for a patio heater is the spot where safety and comfort overlap. That usually means keeping the right clearances, placing the heater near the people who actually need the warmth, protecting the heat zone from wind, and not forcing the unit into a covered or cramped space it wasn’t designed for.
Start with the heater type, check the manual, and map the patio around real seating zones instead of empty space. Do that, and heater placement gets much easier. You don’t need a perfect designer layout — just a setup that keeps people warm, keeps walkways clear, and stays safely away from ceilings, walls, fabrics, and anything else that shouldn’t get too hot.
If you want, I can also turn this into a more polished WordPress-ready version with SEO title, meta description, FAQ shortcode, and image placement notes.