Patio heater maintenance and storage sound like boring chores — right up until your heater won’t light on the first cold night of the season, the flame looks weak, or you pull the cover off and find rust, cobwebs, and a hose that suddenly looks older than you remembered.
That’s the real reason this topic matters. Patio heaters live rough lives. They sit through dust, pollen, moisture, leaves, bugs, temperature swings, and sometimes months of neglect. Even a good heater can start acting flaky if basic upkeep gets skipped.
The good news is this isn’t complicated. You do not need a full service manual brain transplant. A few regular checks, the right kind of cleaning, and smarter storage habits will prevent most common problems before they turn into repair bills, bad heat, or a heater that quits when you actually need it.
What’s covered:
- The quick version
- What to maintain on propane vs electric heaters
- A seasonal maintenance plan
- How to clean a patio heater safely
- What to inspect before each season
- Smart storage for short-term and long-term use
- Common mistakes that shorten heater life
- FAQ
The quick version
If you only want the short answer, here it is: keep the heater clean, keep it dry, inspect hoses or cords regularly, and don’t leave it uncovered longer than necessary.
Here’s the simple version of what matters most:
| Task | How often | Why it matters |
|---|---|---|
| Wipe exterior dust and debris | Every 2–4 weeks in active season | Helps prevent grime, corrosion, and blocked airflow |
| Inspect hose, regulator, or cord | Before each season and during heavy use | Catches cracks, wear, fraying, and leak/shock risks |
| Clean burner area, vents, or element zone | At start and end of season | Helps keep heat output strong and startup reliable |
| Use a cover when not in use | Ongoing | Reduces exposure to rain, debris, and bug nests |
| Move portable units to dry storage | Off-season | Best way to extend lifespan and reduce weather damage |
| Schedule professional inspection | About once a year for gas units | Good for leaks, internal wear, and anything beyond basic DIY checks |
Why patio heater maintenance and storage matter
A patio heater usually doesn’t go from perfect to dead overnight. Most problems creep in slowly.
The heater starts lighting a little slower. The flame looks a little weaker. The reflector gets dirty. The burner area collects dust and spider webs. A hose starts to stiffen and crack. An electric cord gets brittle from weather. Then one day you’re standing outside poking buttons and pretending it’s “probably fine.”
That slow decline is exactly what regular maintenance helps prevent.
| If you maintain it | If you ignore it |
|---|---|
| Better ignition and heat output | More hard starts and uneven heat |
| Lower chance of leaks or wiring issues | More safety risks hiding in plain sight |
| Longer part life | More worn hoses, corroded fittings, and rust |
| Fewer surprise breakdowns | More mid-season frustration |
| Easier seasonal startup | More “why won’t this thing work?” moments |
The big takeaway: patio heaters are outdoor appliances, but they still need a little backup from you.
Propane vs electric vs natural gas — what changes?
The basics stay the same across all heater types: clean it, inspect it, protect it from weather, and don’t ignore obvious damage. But the parts you care about most depend on the heater you own.
| Heater type | Main trouble spots | Best DIY checks | When to stop and call a pro |
|---|---|---|---|
| Propane | Hose, regulator, pilot, igniter, burner ports, tank connection | Leak check, hose inspection, battery/igniter check, debris cleanup | Gas smell, repeated ignition failure, damaged regulator, internal burner issues |
| Electric | Cord, plug, wiring, heating element area, switches, corrosion | Cord inspection, dust removal, moisture check, surface cleaning | Frayed wiring, broken insulation, internal electrical faults |
| Natural gas | Burner passages, fixed gas connections, igniter, corrosion | Surface cleaning, visible inspection, airflow checks | Anything involving gas line fittings, pressure, internal passages, repeated shutdowns |
Quick rule of thumb
- Propane heaters need the most hands-on attention.
- Electric heaters are simpler, but they still hate moisture and neglected wiring.
- Natural gas heaters are convenient, but repairs usually move into pro territory faster.
Patio heater maintenance and storage by season
This is where most people overcomplicate things. You do not need a weekly ritual. You need a repeatable rhythm.
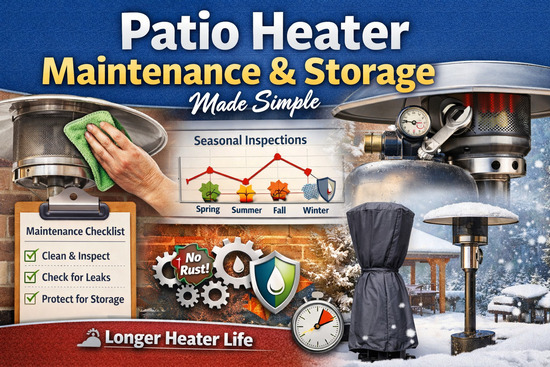
Seasonal maintenance chart
Patio heater maintenance workload by seasonSpring   █████  Deep clean, pre-season inspection, leak/cord check
Summer   ██     Light cleaning, debris checks, cover use
Fall     ████   Heavy-use prep, tighten hardware, test ignition
Winter   ███    Dry storage, cover checks, moisture prevention
What to do through the year
| Season | What to do |
|---|---|
| Spring / first use | Deep clean, inspect all visible parts, test startup, leak-check gas connections or inspect cords |
| Summer / light use | Brush off dust, wipe surfaces, check for nests, keep covered between uses |
| Fall / heavy-use season | Recheck hose or cord, test igniter, clean burner or vent area, tighten loose fasteners |
| Winter / off-season | Dry thoroughly, disconnect portable propane tank, move heater to sheltered storage or use a fitted cover in a protected area |
This is also a good place to be realistic about your climate. A heater in a dry covered patio in Arizona doesn’t live the same life as one sitting through wet Chicago weather or salty coastal air.
How to clean a patio heater without making it worse
A lot of heater cleaning mistakes happen because people treat the whole unit like patio furniture. It’s not.
Start with the basics:
- Turn the heater off.
- Let it cool fully.
- Shut off gas if it’s a gas model.
- Unplug it or disconnect power if it’s electric.
Then clean it in layers.
1) Wipe the outside first
Use a soft cloth to remove dust, pollen, grease, and grime. Mild soap and water are often enough for powder-coated finishes. Stainless models may need a stainless-safe cleaner.
2) Clean the functional areas carefully
For gas heaters, focus on the burner zone, pilot area, emitter screen, reflector, and air openings. For electric heaters, focus on vents and the element area if accessible per the manual.
A soft brush, pipe cleaner, or compressed air usually works better than anything soaking wet.
3) Keep sensitive parts dry
This matters more than people think.
| Safe-ish for light cleaning | Keep dry / don’t soak |
|---|---|
| Exterior housing | Gas control valve |
| Reflector surfaces | Igniter parts |
| Non-electrical frame pieces | Plug and cord ends |
| Accessible vents with dry brush/air | Heating elements |
| Removable screens if manual allows | Switches and electrical connections |
4) Inspect while you clean
Cleaning time is also problem-spotting time. Look for:
- Rust
- Dents
- Cracks
- Loose bolts
- Frayed insulation
- Kinked hoses
- Corrosion near fittings
- Warped burner screens
If something looks sketchy, don’t ignore it just because the heater still turns on.
The pre-season inspection that saves the most headaches
Before you use the heater after a long break, do one slow, boring check. It saves a lot of drama later.
| Part to inspect | What you’re looking for | First move |
|---|---|---|
| Hose and regulator | Cracks, stiffness, corrosion, kinks | Replace damaged parts, don’t “test it anyway” |
| Gas fittings | Loose connections or leak signs | Do a soapy water leak test |
| Igniter | Weak spark, no click, dead battery | Replace battery or inspect igniter area |
| Burner / pilot area | Dirt, soot, cobwebs, insect nests | Clean gently with air/brush |
| Cord and plug | Frays, discoloration, brittle insulation | Stop use if damaged |
| Reflector and frame | Rust, wobble, bent parts | Tighten or repair before use |
| Base or mount | Instability or looseness | Fix stability before firing up |
Simple startup flow
Heater won't start?→ Check fuel or power first
→ Check tank valve / outlet / breaker
→ Check igniter battery or plug condition
→ Inspect for dirt, webs, blocked airflow
→ Leak-test gas connections if propane/natural gas
→ Still not right? Stop and get it serviced
Storage matters almost as much as maintenance
A clean heater stored badly can still come back in rough shape.
Short-term storage
If you’re using the heater on and off through the season, a fitted cover is a good move. It keeps off leaves, dust, and random debris. Just make sure the heater is cool and dry before covering it.
Long-term storage
For portable heaters, a dry garage, shed, or covered storage area is your best option. Get it off wet ground if possible. Even a sturdy cover works better when the unit is also sheltered from wind-driven moisture.
Mounted heaters
Fixed heaters obviously can’t go into the garage. For those, use whatever protection the manufacturer allows, inspect before the next season, and keep them under cover if possible.
What about the propane tank?
For off-season storage, disconnect the tank from the heater. Store the propane cylinder outdoors in a dry, ventilated area — not inside your home or tucked into a random indoor corner.
Storage scorecard
| Storage setup | Protection level | Notes |
|---|---|---|
| Dry garage or shed + cover | Excellent | Best option for portable heaters |
| Covered patio + fitted cover | Good | Fine for shorter periods if weather exposure is limited |
| Outside with cover only | Fair | Better than nothing, but moisture and wind still win over time |
| Open deck, no cover | Poor | Fastest path to rust, dirt buildup, and ugly surprises |
The most common mistakes people make
A lot of patio heater problems are self-inflicted — usually from good intentions mixed with laziness.
1. Leaving it exposed because it’s “made for outdoors”
Outdoor-rated doesn’t mean invincible. Constant rain, snow, humidity, and debris still age the heater faster.
2. Storing it dirty
If you put it away with soot, dust, or moisture on it, you’re basically storing corrosion and blockages for later.
3. Ignoring weak performance
Low flame, odd noises, hard starts, or uneven heat are warning signs. They are not just quirks.
4. Forgetting about bugs
Spiders and insects love small sheltered openings, especially in gas heaters. That can mess with airflow and ignition.
5. DIY-ing the wrong repair
Basic cleaning and visual checks are reasonable. Gas line repairs, internal electrical work, and major component replacement are not casual weekend experiments.
A patio heater maintenance and storage checklist you can actually use
Before heavy-use season starts, run through this:
- Heater is completely dry
- Exterior wiped down
- Burner, vent, or element area cleared of debris
- Hose or cord inspected closely
- Propane fittings leak-tested if applicable
- Igniter tested
- Base or mounting hardware checked for stability
- Cover inspected for tears or moisture trapping
- Propane tank stored correctly if not in use
- Manual kept handy for model-specific clearances and startup steps
That checklist alone catches a lot.
Bottom line
Patio heater maintenance and storage are not glamorous, but they’re one of the easiest ways to get better performance, fewer breakdowns, and a longer life out of the heater you already paid for. Most of the job is simple: clean it, inspect it, protect it from weather, and don’t ignore early warning signs.
If you do just a few things right — preseason inspection, regular wipe-downs, hose or cord checks, and dry off-season storage — you’ll avoid most of the common headaches. That means less frustration, safer operation, and a much better chance your heater actually works when the cold night shows up.
If you want, I can also make this even more “blog-ready” by adding a featured snippet section, callout boxes, and 2–3 internal link anchor suggestions for your patio heater cluster.